How I made it: BOTW Fisherman's Shield
/
When I started this week, I didn’t figure I’d be doing any sort of big prop build or anything. I’ve dipped into playing Legend of Zelda: Breath of the Wild quite a bit in the last couple of weeks, and I realized that it would be pretty simple to make one class of shields that you can pick up in the game.
One of the things that I love about this game is how much cool design is in it. There are tons of weapons, costumes, and equipment that you use throughout the game. I made Bram a costume from the game a couple of years ago, and while he’s outgrown it, I’ve still got the Shiekah Slate and Guardian Sword ++ hanging in my workspace.
I didn’t end up making a shield for him that time around, but it’s something that’s been in the back of my mind over the years since I started playing. Somehow, the idea got into my head on Monday that I could build one pretty simply. I took a bunch of screenshots, and began looking at the designs. There are three that I liked in particular: the Emblazoned, Hunter, and Fisherman’s shields, all of which have roughly the same design: they’re made of wood, with a metal edging and painted design.
After doing a little looking around online, I figured out the best way to build this: glue together a couple of boards, then cut them into a circle. Fortunately, I have a pile of 1x4 boards behind my shed, and I ended up cutting down two of them into 2 foot lengths.
From there, I glued and clamped them together, and let the new slab sit overnight.
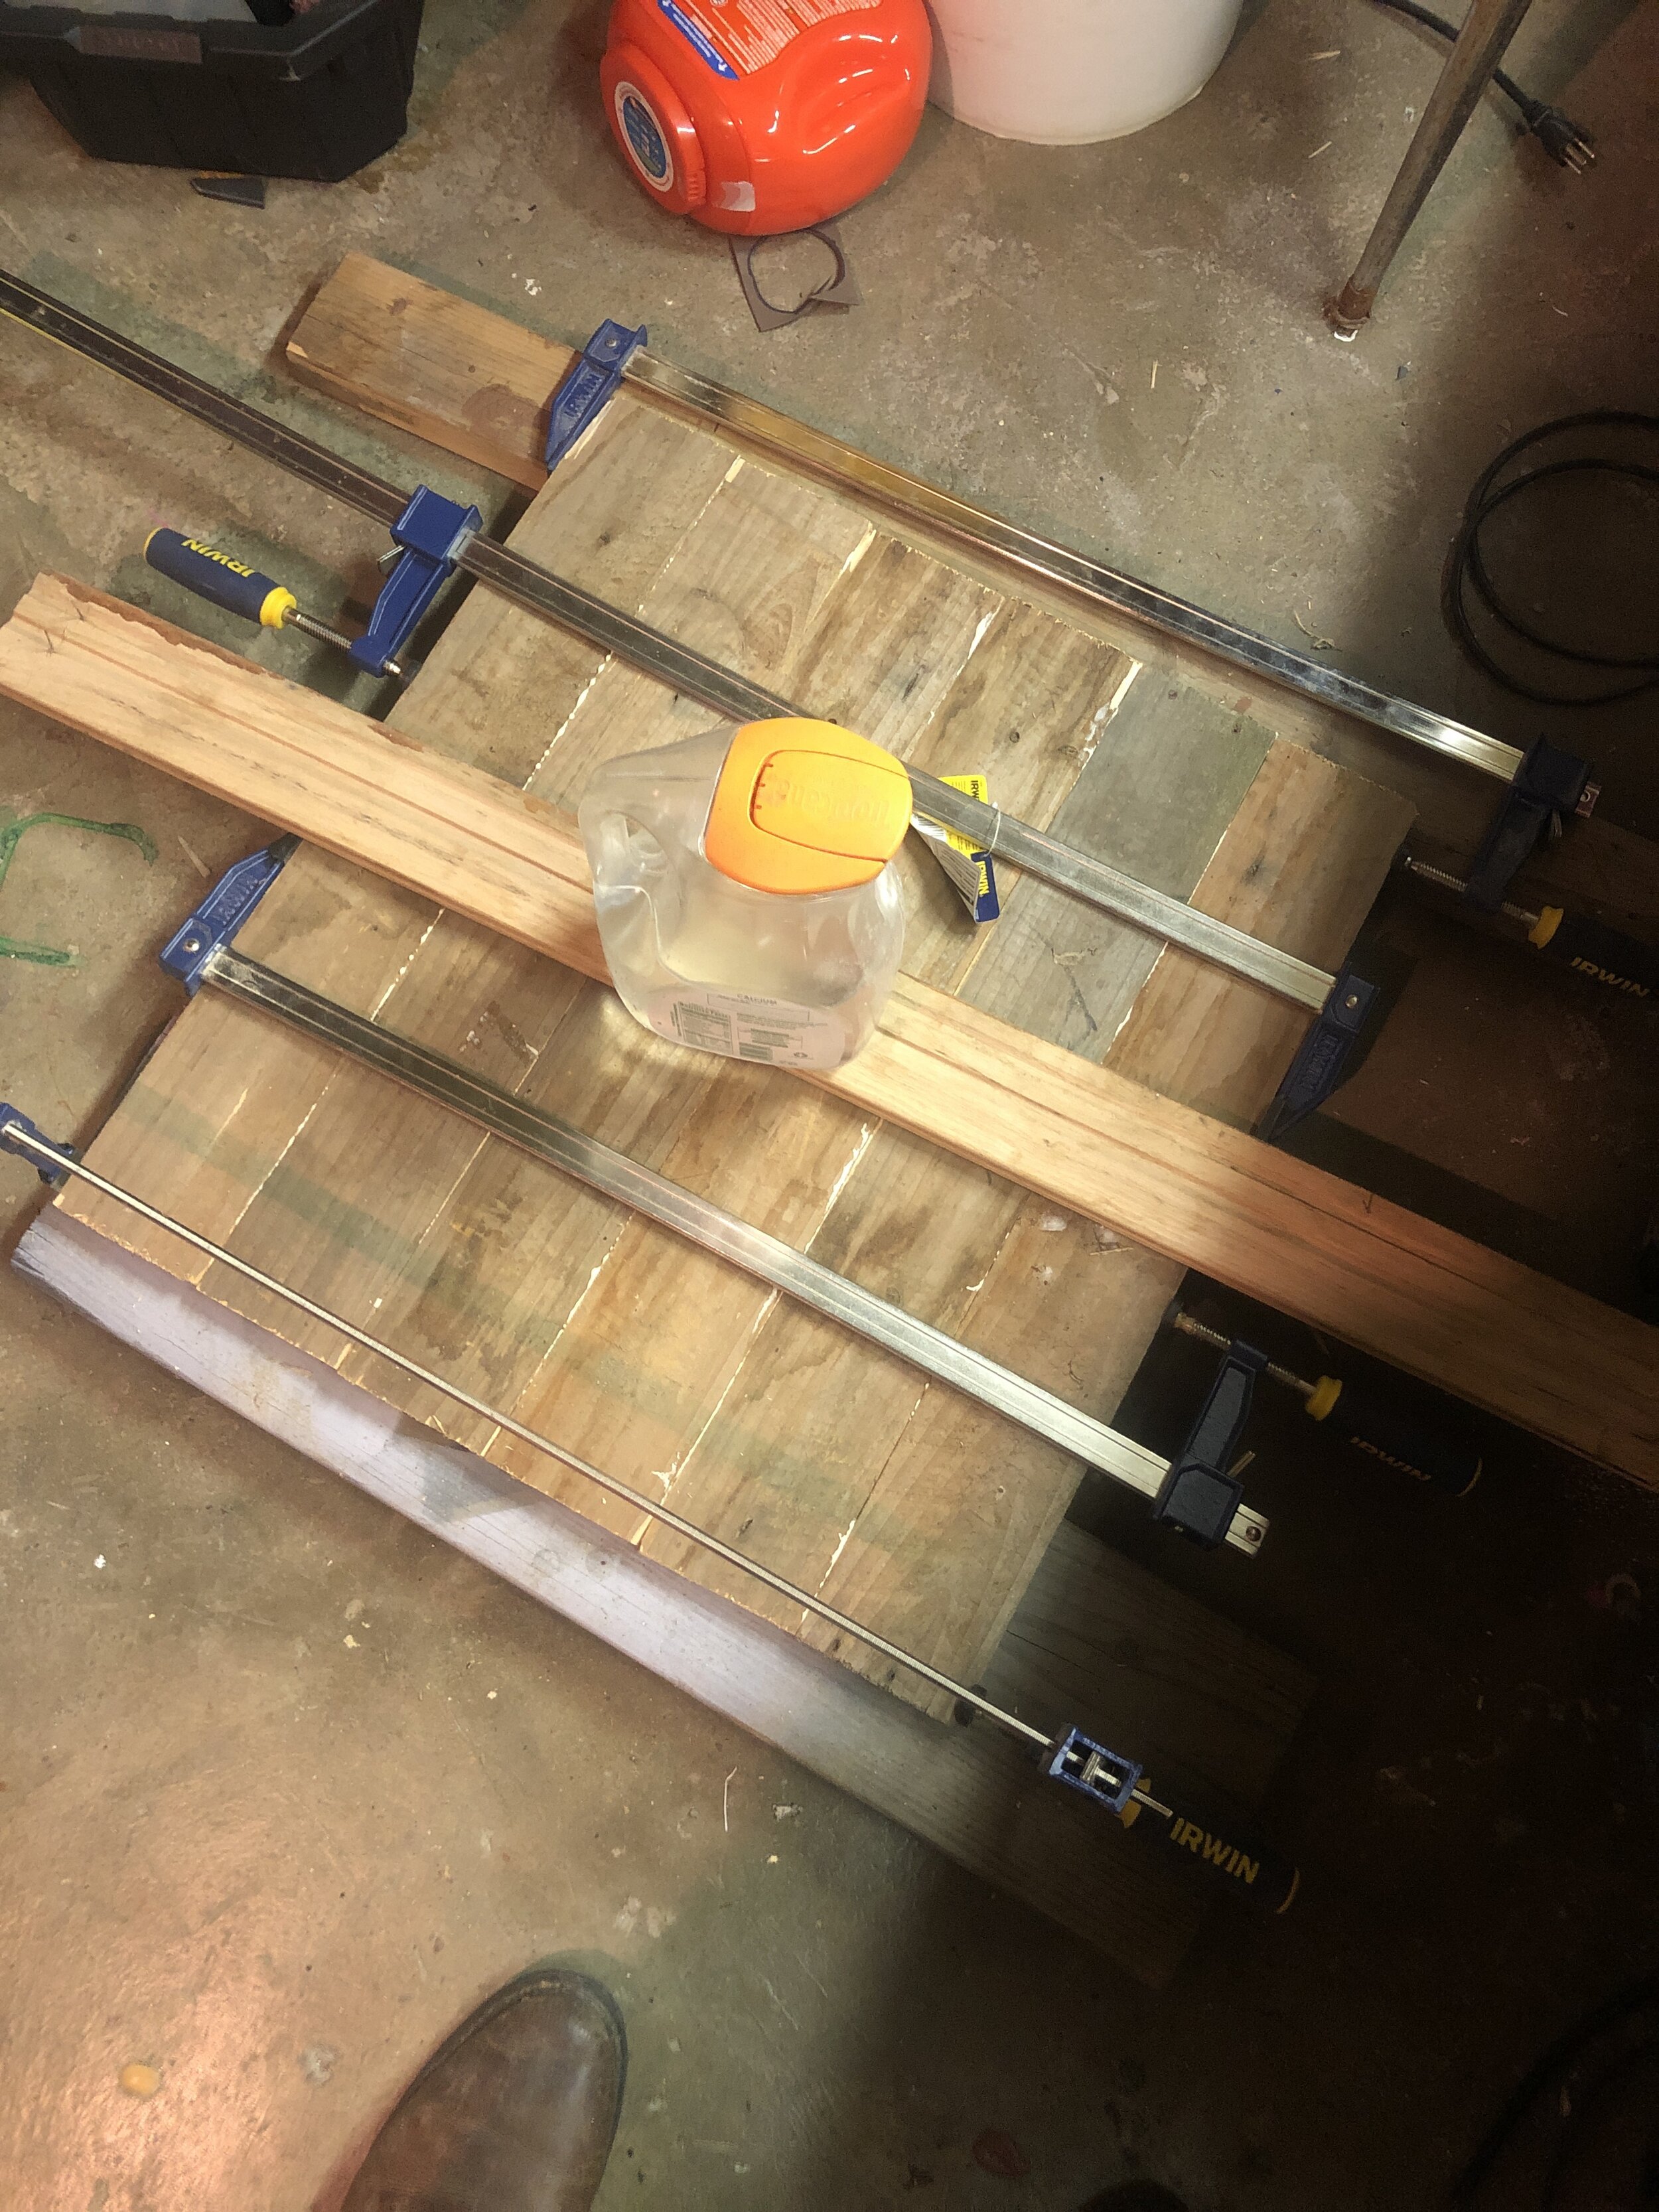
I let that dry overnight. (The board and jug of water on top is to make sure it lay flat-ish — it popped apart the first couple of tries when I clamped them together) In the morning, it was fully dry. I figured out where the center was, and drew out the outline of the shield, then cut it on my bandsaw. Once that was done, I took a sander to it to smooth down some of the roughness, and then a planer to take down some of the high points. I didn’t do too much here: I wanted to leave some rough surface to make it appear rough-hewn and a little less polished. Once that was done, I bought a handful of bolts and nuts, and pre-drilled the holes for them to go into.
I picked up a roll of aluminum flashing with the intent of using that as the metal edging. Tutorials that I’d seen online showed a method for folding it over the edge in tabs. I started with that, measuring out a ring and used resin to hold it into place. But once getting it on there and once I started to fold it down, I realized that it just wouldn’t look good: I’d have to fill in the lines with bondo or something, and it wouldn’t quite have the same effect. I ended up tearing that off and started from scratch, using a sheet of thin EVA foam for another project. This time around, I just traced out the outline and cut out a ring.
EVA foam is wonderful (I’ll be talking a lot about it in my book), but you can’t jut paint it up: there’ll be little bubbles and holes. I thinned out some Elmer’s glue to use as a sealant, waited for it to dry, then hit the entire thing with some metallic spray paint. Because the bolts in the ring had to match, I painted the tops as well. I set those aside to dry, and moved onto the next part: painting the shield face.

The first step was to paint on the background: I mixed up some blue and green to get the approximately right color, and painted it on. Once that dried, I took coarse sandpaper to the surface, roughing out the lines between boards in a way that matched the one in the game. I used my Dremel to score in the deeper gouges. Weathering is a critical part of any costume. I’ve described it as a story in and of itself, because it conveys that the object has gone through some sort of journey of its own. The scratches and gouges show that something happened to it.
Those lines proved to be really useful for the next part: the fish. I ended up hand-sketching this on, using the lines as a guide for width and hight for the various triangles. I sketched out the outlines in pencil, then painted them up in light blue and yellow. They’ll need another coat once it dries completely, but the first coat went on really well.

After that, I had to put the ring on, now that it was dry. I put the ring on the front, then flipped it over, using a pick to mark where needed to make a hole for the bolt in the foam. I used another attachment on my Dremel, and drilled in the holes. Note to self next time: measure out the holes a bit better, or mark which ones are which. It turned out that there’s only one way for it to go on once the holes are drilled in, and it took a little while to figure out the right orientation.
Once I figured that out, I put the bolts in, screwed on the nuts, and tightened them: I didn’t do so too tightly, but enough that the bolt sank into the foam a bit, making it look as though it was really driven in hard enough to bend the “metal”.
With that, it was done — ish. I’ll touch up the paint a bit, shave down some of the foam edging, and then wait for for the weather to warm up a little tomorrow to hit the entire thing with a coat of matte clear coat. Once that’s dry, I’ll add on a little extra weathering and grime around the edges, gouges, bolts, and so forth, to give it a little more of a used look. After that… I’ll have to find some space on the wall.
This was a lot of fun, and when I started, I expected it to take a week or so. It came together really, really fast, which surprised me a little. I think this was a combination of a) acrylic paint drying really quickly, and b) it’s not really a hard form. I’ve got plenty of other boards lying around, so this likely won’t be the last one I make. Next time, I’ll do a little more to make sure that the boards are completely flat, that the circle I’ve drawn is a bit better, and will probably take a little more time to sketch out the design. This one came out pretty nicely, but there are little places that I’d work to improve upon for next time.
EDIT: touched up the paint, clear-coated and weathered it. I can say that now it’s done: